"Can we have some new pages/forms created in ERP Cloud ?" or "Business requires to collect and maintain some additional information in ERP Cloud. Is this possible?"
These are some inevitable questions asked by many ERP users, especially after transitioning from Oracle EBS to Oracle ERP Cloud. Well, the answer is 'Yes'.
Application Composer is a powerful tool that enables us to create custom pages as per business requirements. Let's see how to use Application Composer.
Roles Required:
First of all, in order to be able to access Application Composer tool, one needs to have
'Custom Objects Administration Role'. Role Code is ORA_CRM_EXTN_ROLE.
Additionally, one may be granted these roles:
Customer Relationship Management Application Administrator
Application Implementation Consultant
Master Data Management Application Administrator


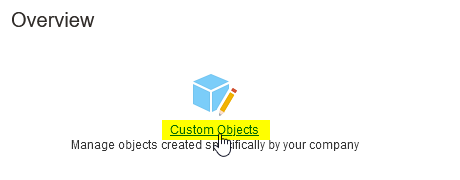
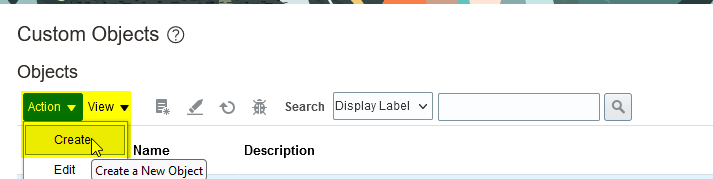
Now, lets access Application Composer and we'll create a new page to capture view, and maintain Customer Details (PS. This has no relation to AR Customers. This will be an independent page with it's own data structure in the backend).
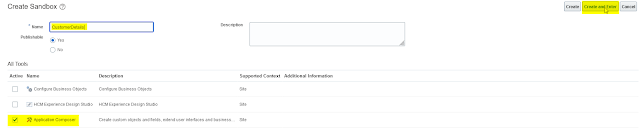
Activate Sandbox:
First of all, we have to activate a new Sandbox. Let's name it CustomerDetails and select Application Composer under Tools. Create and Enter the Sandbox.
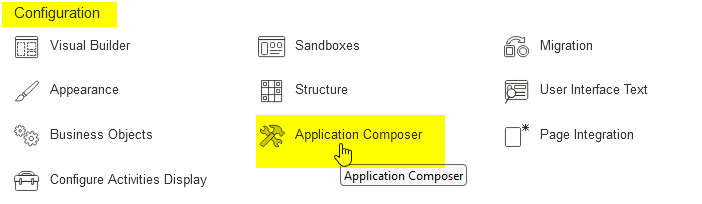
Application Composer:
Now, you will see a new option named 'Application Composer' under Configuration menu. Open it.
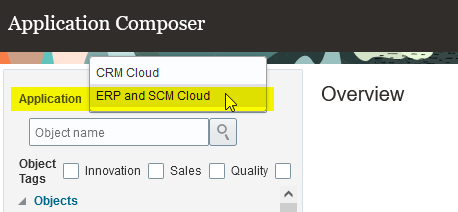
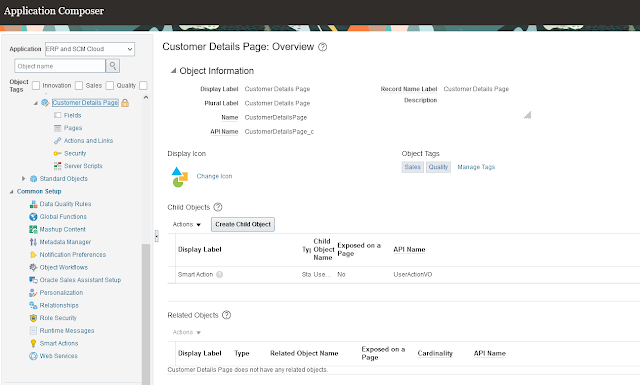
Now we have entered the Application Composer tool.
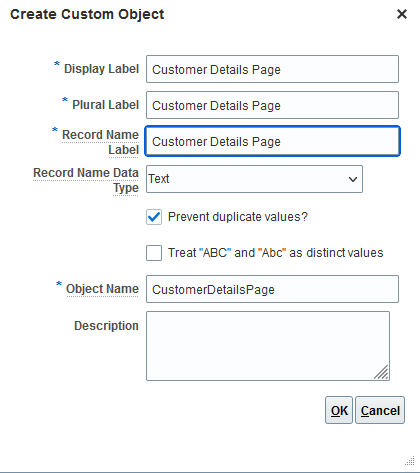
Plural Label: The plural label is used when the object is displayed as the detail section of a master-detail page, such as on a subtab.
Record Name Label: This field is used to specify the display label for the object's RecordName field.
Record Name Data Type: Choose between Text or Automatically Generated Sequence.
Prevent Duplicate Values: With this box checked, one can prevent users from inputting duplicate record names.
Object Name: This is the internal identifier of the object and needs to be unique.
Description: Description of the object.
Fields:
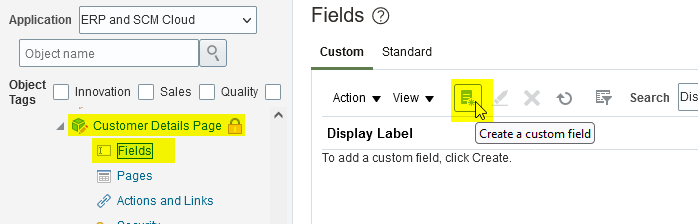
This brings a pop-up page asking for the Data Type for this field. Let's select Text for our use case and click OK.
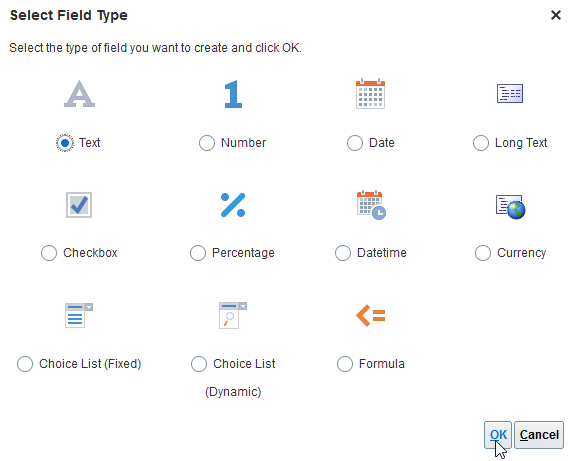
Now, let's create three fields by following above process.
Customer Name:


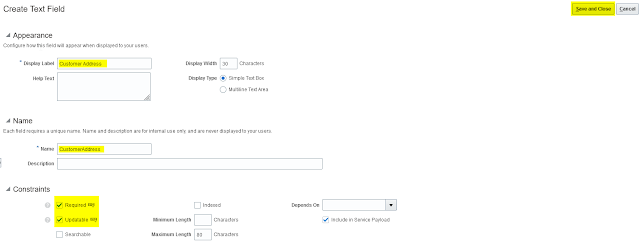
Customer Address:

Navigate to Pages and click on 'Create Default Pages'


Landing Page: As the name indicates, this is the first/landing page we will see when we enter Customer Details area.
Creation Page: This is the page which enables us to create new records and is shown when user clicks on Create button.

Now, let's click on Default custom layout option under Landing Page Layout

Here, click on Edit option under Summary Table


Save and Close

Here, we need to click Edit option under PageCreate section as shown below:


Here, we need to Edit the SubTab:Summary section as shown below:


OR


OR the same can be accessed from the Others submenu under the hamburger menu:

Here, we can see a section with No results found. This is our Landing page.


Once we return to the Landing Page, we will now see the test Customer we just created.


Details Page:

0 comments:
Post a Comment